
This blog is for those who edit on tablets or mobile devices
Have you ever been scrolling through social media, saw a photo that made you stop and think, how the heck did this person take this photo? Or how did this person merge all of these elements together to create something so whimsical?
The most popular composites I see on social media are sky replacements with sunsets, stars, and moons.
So how do they do it? Some people are highly skilled in photoshop and spend a good amount of time piecing a photo together and the thought of that can be very discouraging for us beginners. So, I am going to show you how I, a beginner with composites, piece together my portraits.
As mentioned at the beginning, this is a tutorial for those who edit with tablets and mobile devices.
I create composite photos using the app, “Adobe Photoshop Mix”. This is the most user friendly app for composites that I have found. For the purpose of this blog, the example that I am going to doing is a sky replacement with stars.
Before you start to working on your composite, you will want to determine what two photos you want to combine.
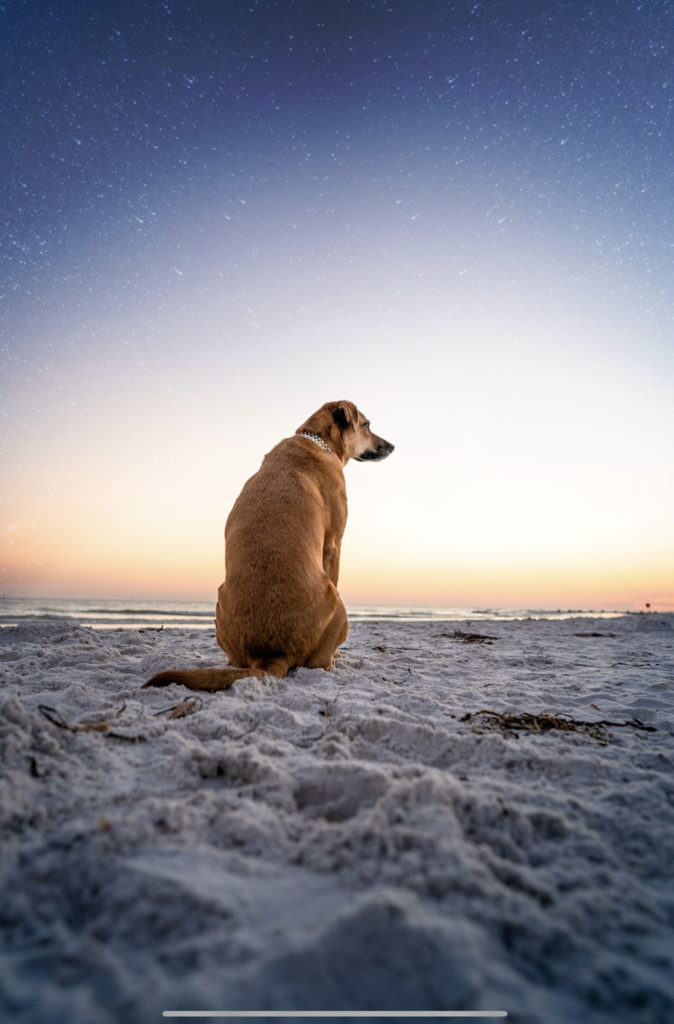
I recommend utilizing a photo that has a lot of empty space for the sky or a horizon that is easy to add to; straight lines, horizon blown out of by the sun at sun set. Your new sky should allow you clip sections out of it (if there are other items in the photo) to place it seamlessly into your composite, I chose this photo:

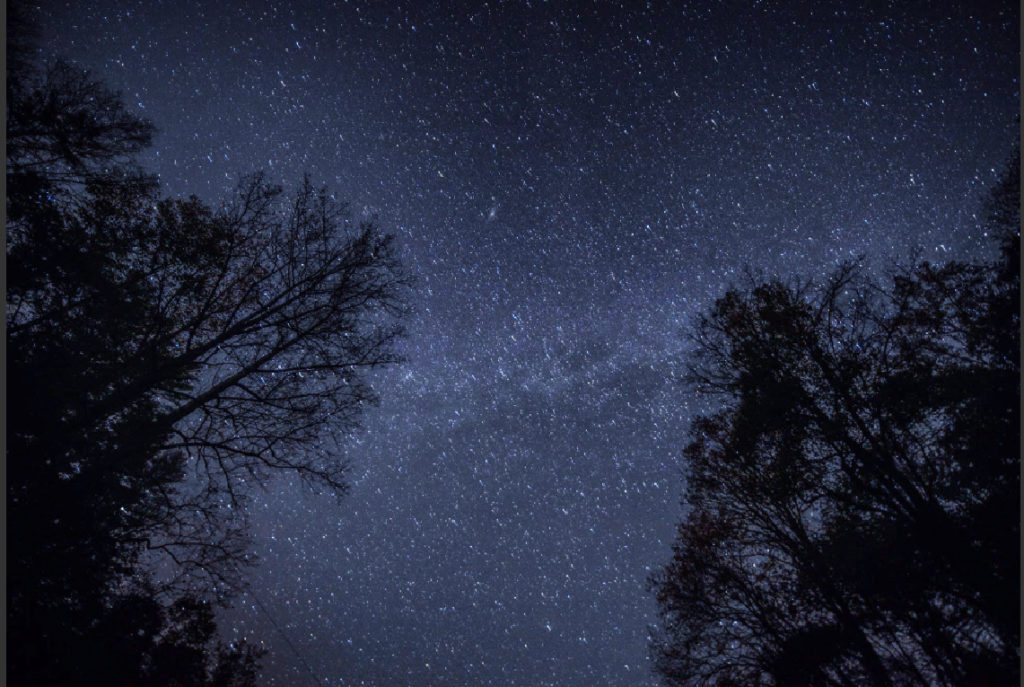
To start,open your primary photo and then open a new layer and add your sky. I will be adding the stars from this photo to the image shown above:
It’s ok if a portion of the sky is obstructed, you should be able to still utilize it. For this example I am going to use the middle portion of this photo to overlay the stars on the beach.
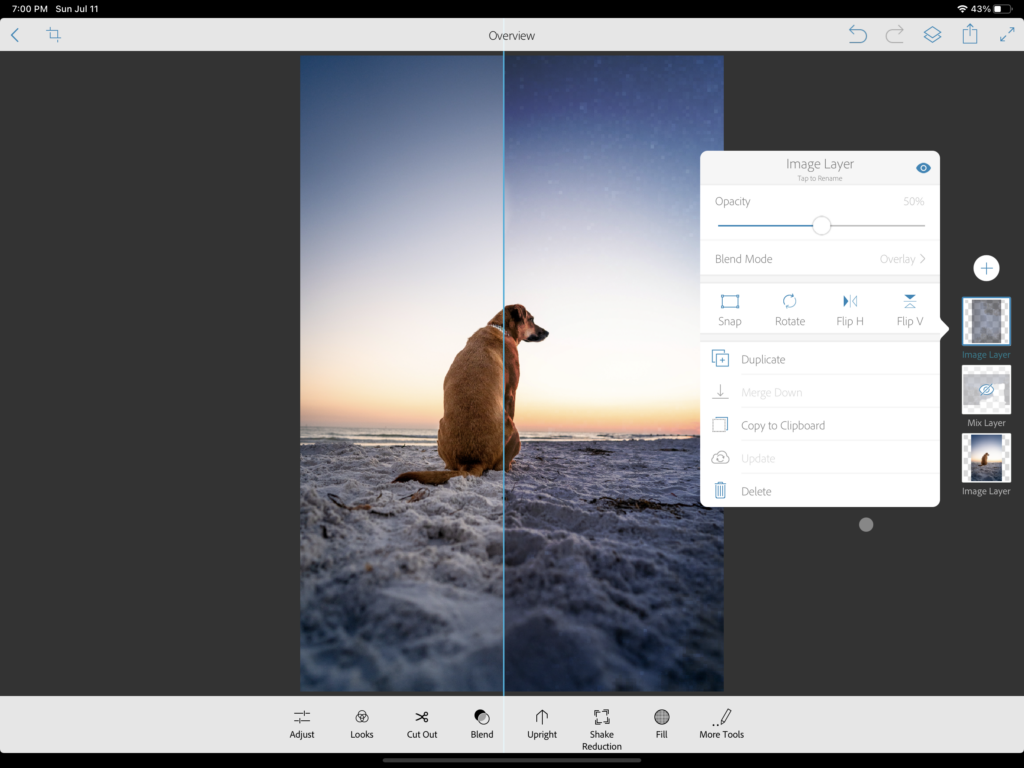
After you have imported the sky photo, click the sky layer once and an option menu will open. With this menu adjust the blend mode and opacity to your liking. Since I am adding star detail to the sky and would like to keep the original sky color, I am reducing the opacity to 50% and setting the blend mode to overlay. Also, since I am using only a portion of the sky photo to replace the original sky I am going to duplicate this layer and flip it horizontally so that it covers the entire sky. Just note, if you are doing this method, you will need to adjust the two layers so there is not a “seam” that pops up. Where the layers are overlapping each other displaying a line.
Now your sky is covering your entire image, including your subject and you will want to reduce or remove the amount of your sky covering your subject to provide a more realistic look. Select one of your sky layers and at the bottom of the app there is an option titled, “cut out” select this. I recommend using the basic brush and adjusting the settings of it to your liking and use the erase option.


Be sure to have your eraser brush feather to be softer vs harsh, in this example I am going to have the bright horizon work in my favor and aid in the transition to the stars.
After brushing away the parts of the photo that you are not going to utilize, adjust your layer more if needed and thats it! Here is my finished product!