Do you normally adjust the color of your dog’s coloring with the warmth and/or tinting tool? Only for it to adjust the entire image and make you go cross eyed trying to correct it without making your dog look completely unnatural? Or have you ever been so excited about a photo you took of your dog only to be disappointed when you went to edit it and couldn’t get the color right on your pup’s fur?
That has been me on multiple occasions and it has made me want to rip my hair out and question if I’m good enough.
My dogs are an orangish red color and that has been a nightmare to learn how to edit. Presets make them look like radioactive Cheetos or like death from desaturation. If you struggle with getting the color right in Lightroom when it comes to your dog’s fur look no farther! I am about to make your life so much easier. This trick can be used in both the mobile and desktop version of Lightroom.
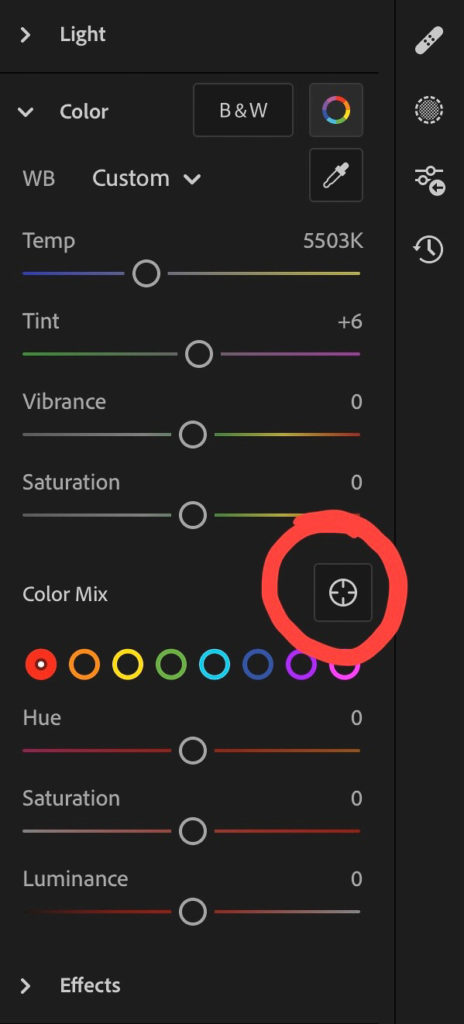
Disclaimer- I edit my photos on an iPad Pro, therefore I edit on a Lightroom mobile app version for iPads. The screens included below are going to be for that particular The first thing you are going to need to do is load your photo into your Lightroom program and click on the adjustment panel.
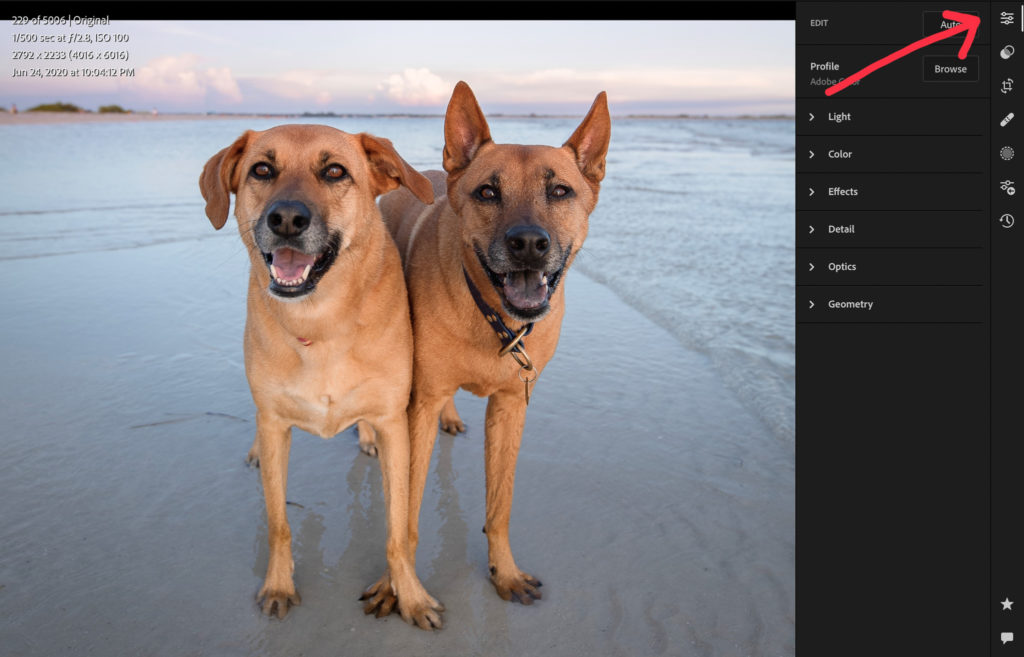
From here you are going to open the section titled, “Color” and you will click the “color mix” tile and then from the color mix drop down menu, click the icon that looks like a cross hairs.
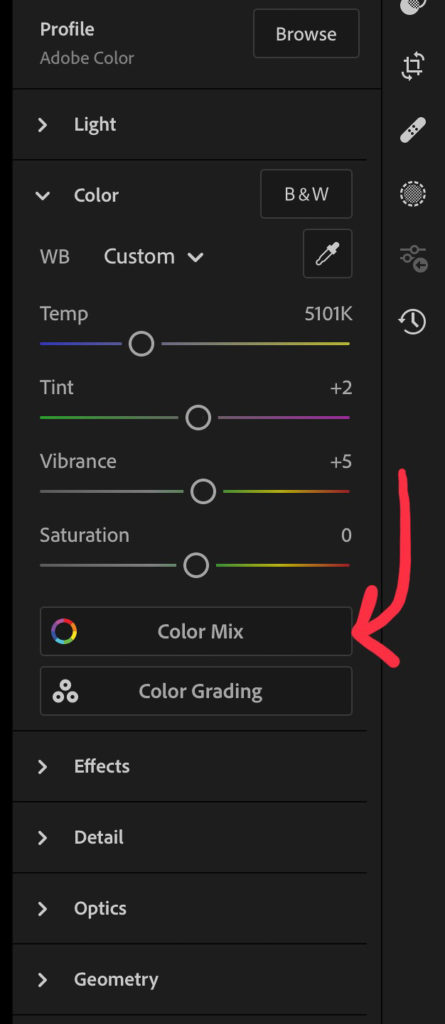
You will see the hue, saturation, and luminance sliders disappear and your menu will look similar to this.
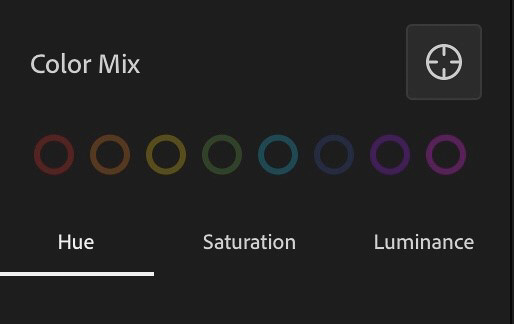
Depending on which of the three are selected, that is going to be what you are adjusting.
Hue is the tone and shade of color
Saturation is the color intensity, more color or less color
Luminance is going to be brightness for the color, lighter or darker
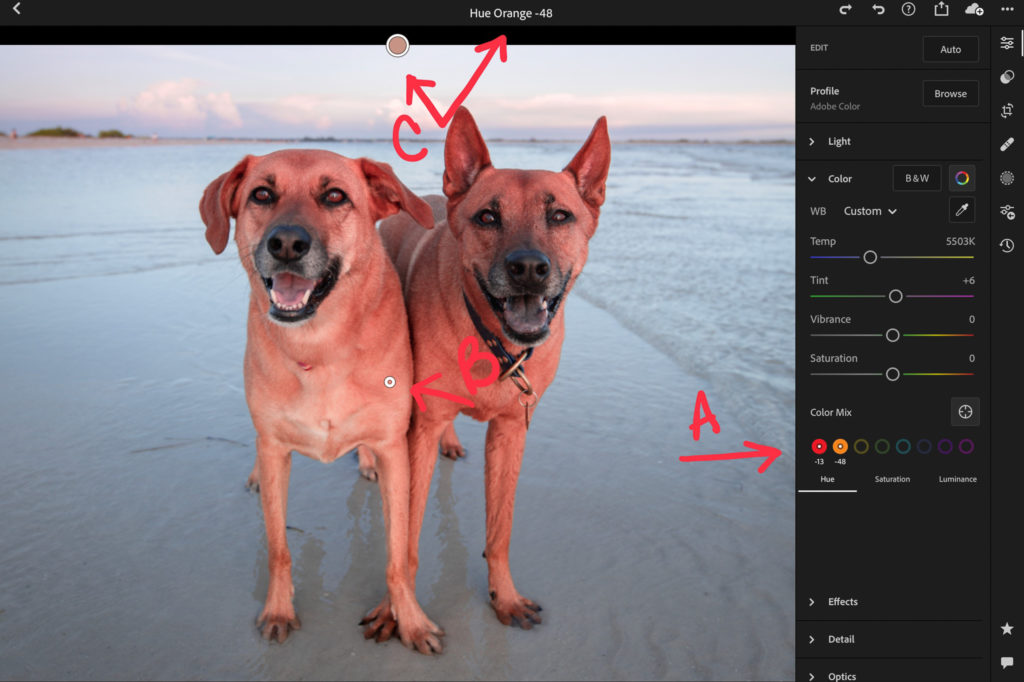
Next, on your photo, select and hold (click and hold if you’re on a PC) the color that you are wanting to adjust on your dog. On the photo below, you will see that the color I am adjusting is indicated by the red “B” on the photo below.
Here is the breakdown of the labels on the photo:
A– HUE adjustments, hue is underlined, therefor it is the item being altered
B– Point you selected for the color that you want to change
C– Enlarged color dot from label B
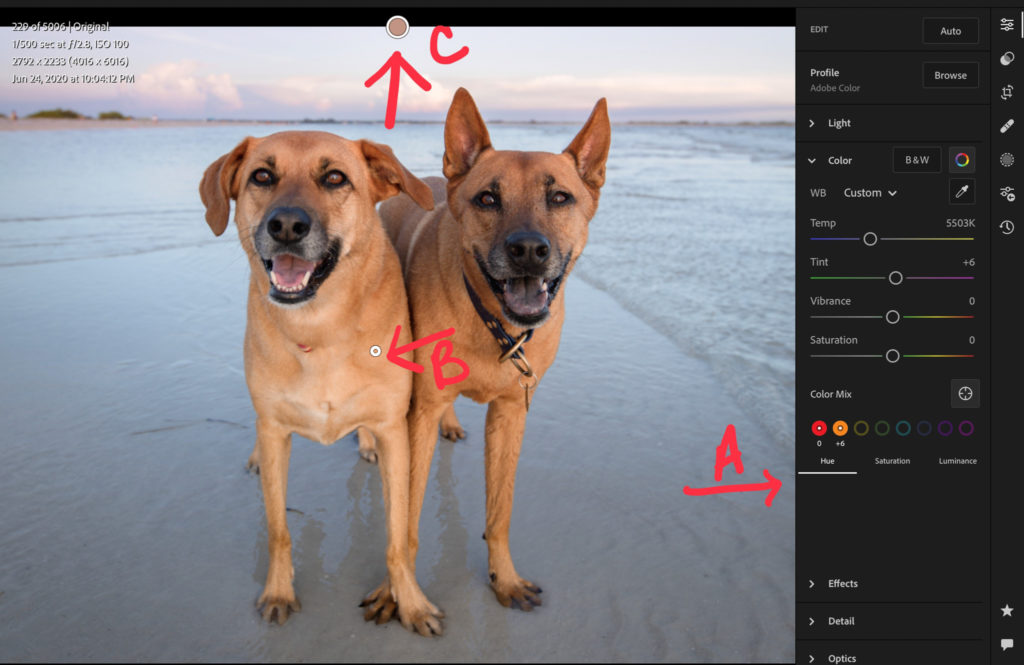
Label A indicates that label B is a blend of orange and red tones and will be adjusting these two to get the color you want. Label C is a zoomed-in indicator of B at this time.
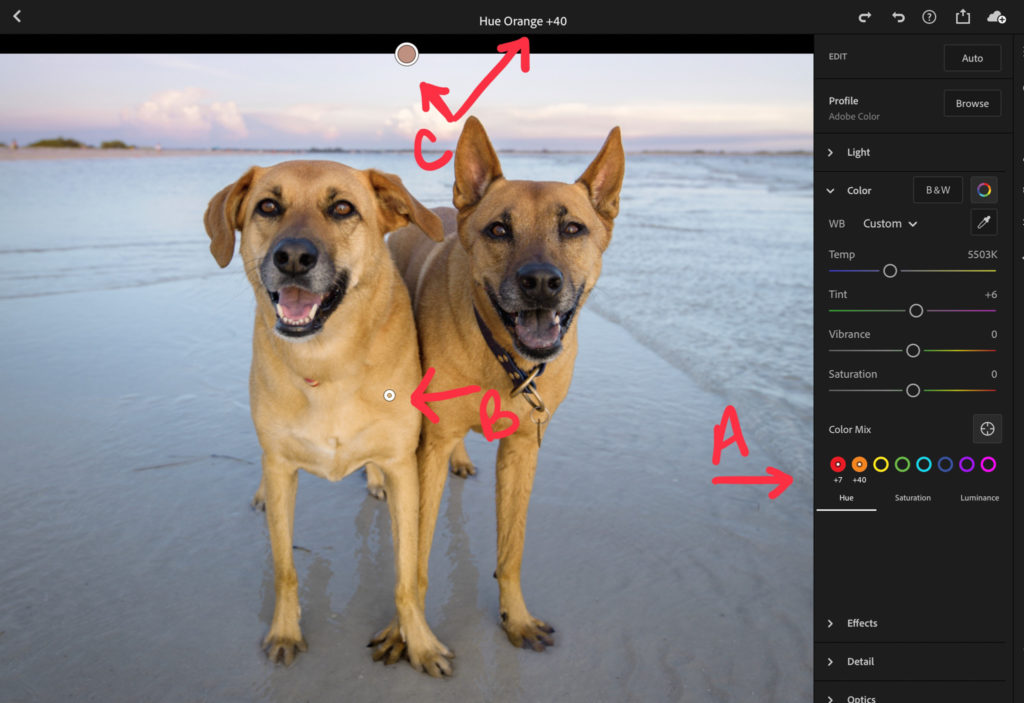
Once you have made a selection on your photo to adjust, you can drag up or down to adjust the hue of the color, in this case, it is label B. In the image below, label B was dragged up and you will see that the hue has changed. Please note that you must click and drag to change the color. Once you let go, the selection point “label B” is released and you are no longer adjusting that point.
.
Label A, you see the tone values have changed.
Label B, this is your originating color point
Label C, primary color change value, matches label A
You will see the increased orange reduces the number of red hues in the dog’s fur. The next image is with the label B point being dragged down.
Label A, you see the tone values have changed in the opposite direction
Label B, this is your originating color point
Label C, primary color change value, matches label A
With dragging the point down it makes the color selected lean more towards the red.
Using this selective coloring tool you will adjust all tones within the photo that are similar to the one you selected, so that is something to be mindful of. The adjustments in this article are extreme just to show how much it can affect your photo.
You can adjust the saturation and luminance level the same way and a combination of these custom adjustments. This particularly works well for brown and red dogs since a minute adjustment in either way can completely throw off the entire look of the dog.
I have found that this is the best way to make near perfect color adjustments in Lightroom. This is also a great way to adjust and edit the color green,I know if you are like me, you can’t stand editing the color green.
When using these adjustments and they happen to adjust more than you want them too, I recommend just focusing on your subject and using selective edits to re-adjust the items that were effected.
Give this editing technique a try and I am sure you will be able to achieve near perfect color on your dogs in photos quicker than you were able to before!
If you found this article helpful, please share it with your friends, on Instagram, and/or pin it to Pinterest!